Making of a pantry drawer
Thu Nov 14 2024
“If you’re going to spend all this time in your work shed why don’t you build something useful” -my wife.
Ok, I’ve now built myself a bench, installed a vise on it, built a router plane. It’s time to build an actual piece.
The pantry in our kitchen is quite deep so several of the shelves have a pull out drawer to make it easier to get at things in the back. The drawers are only on the bottom two levels though and it’d be quite useful to have another set as we’re losing track of the sugar bars in the back of the junk food shelf.
Time to learn how to dovetail! Indeed, it was this video on how to make dovetail joints that started me down this whole path when the algorithm threw me a curve ball. The first trip to Lee Valley last year was to buy everything needed for dovetailing so we’re finally doing it!
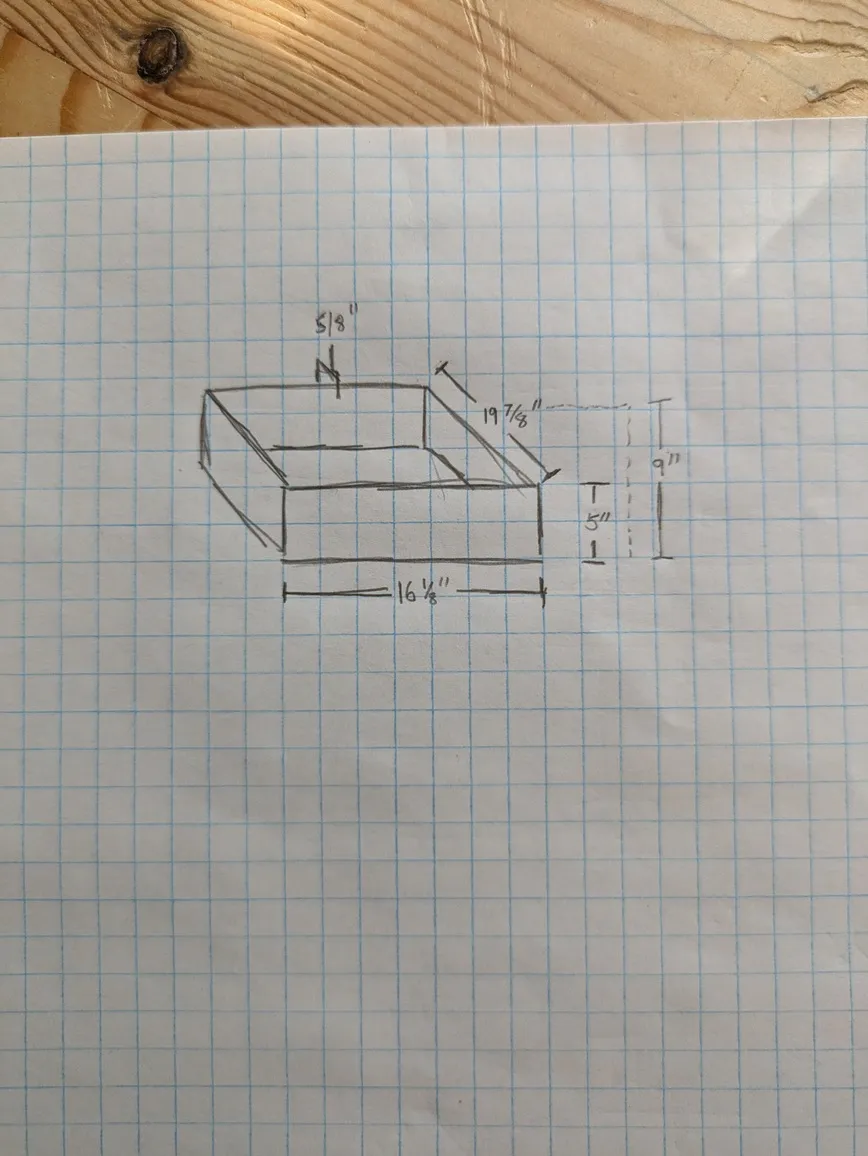
Step one was to do some measurement on the existing drawer boxes and head over to the orange store and grab some pine boards.
I watched a number of videos in addition to the above one: Rob Cosman has a couple and Paul Sellers. In the end I blended some of the smaller tips I saw in each. I used a coping saw to remove waste (Cosman, Estlea), made a small chiseled notch to align the shoulder during layout (Estlea), and largely followed Paul’s process for layout.
I did a test run on some scrap pieces and it actually went better than expected!
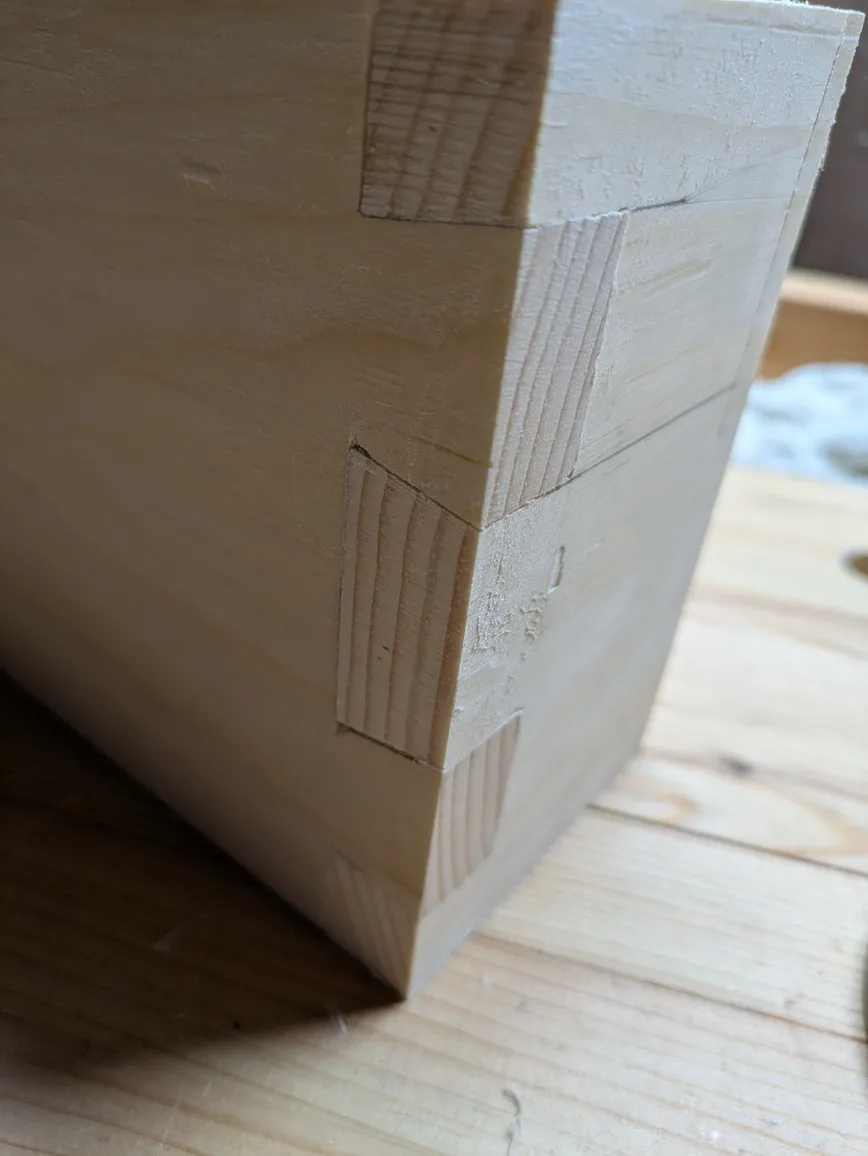
That’s a reasonable dovetail! It’s not quite perfect but this scrap piece of wood wasn’t squared or prepped in any way so I wasn’t expecting perfection.
On the actual work piece I did manage to make everything nice and square. Squaring a line around the board comes back to where I started.
The dovetailing went relatively smoothly. Though the joints fit and were mostly gap-free, they were a bit loose. My cuts weren’t perfect but with pine I could also have erred on the side of larger pins since it compresses so much.
Speaking of compression, I read somewhere that with pine you really need sharp tools. Chopping with a chisel tends to mush the fibers instead of cleanly cutting them.
But this was a really good way to see and understand the difference a truly sharp edge makes. I realized the diamond stone setup I’m using wasn’t really getting that sharp so I sharpened and finished my chisels on my Shapton Wine whetstone and boy did it make a difference:
I’m starting to think diamond stones were a mistake. They’re convenient but they’re slower and don’t leave a great edge. The whetstones are a bit of a pain since they need flattening and are more messy but they feel better, work quicker and result in a mirror finish that’s scary sharp.
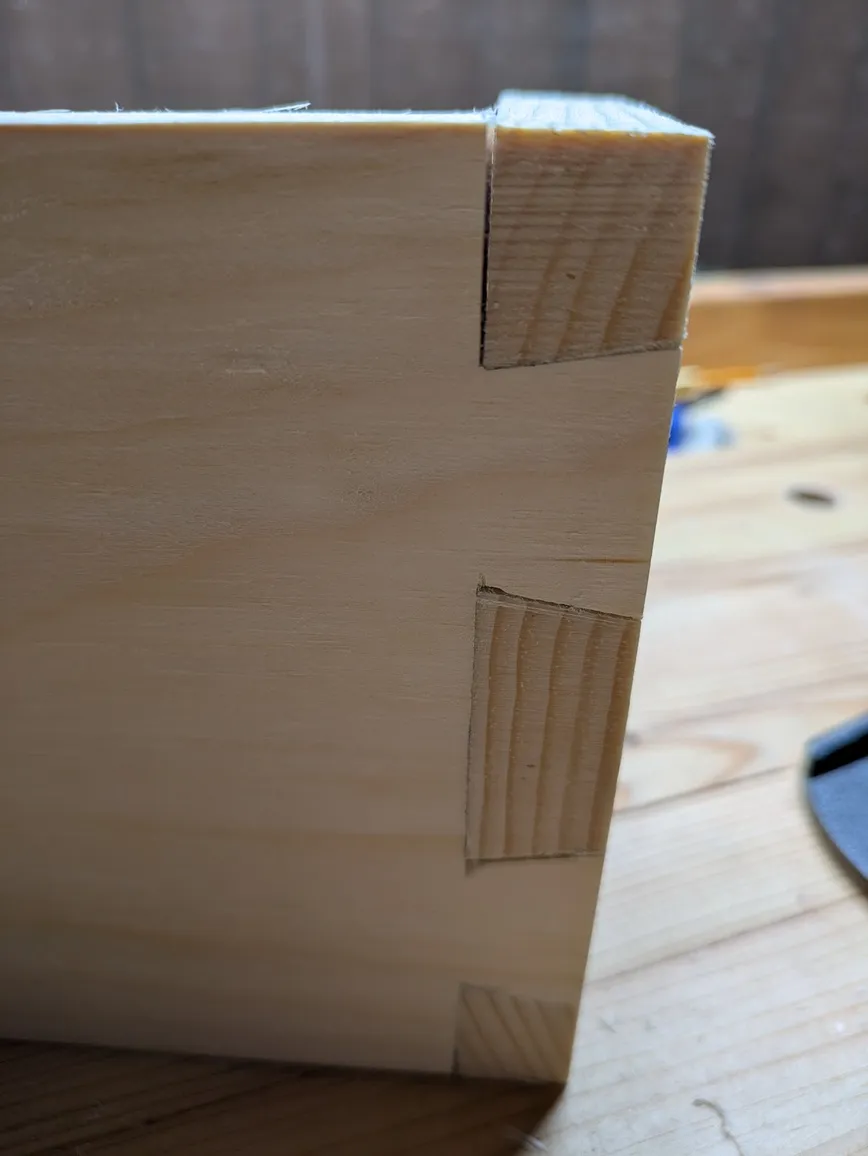
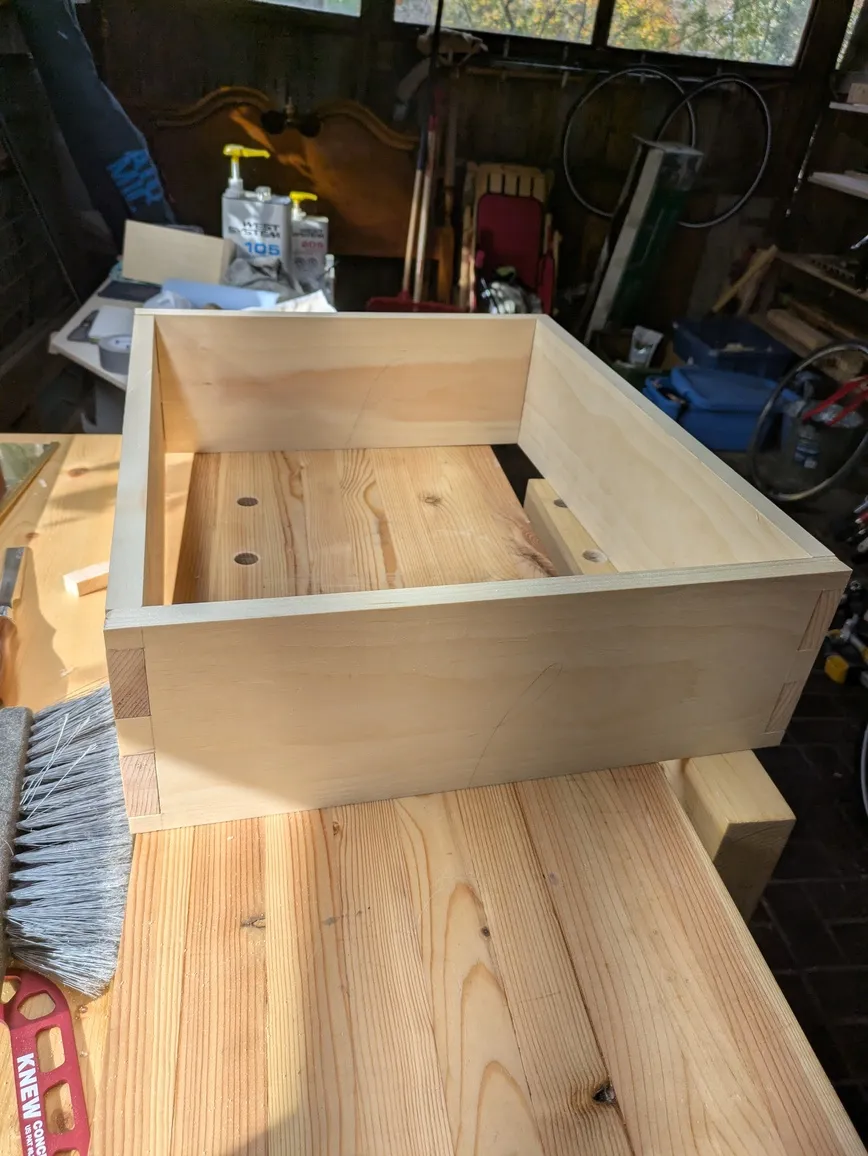
Anyway, I finished all my dovetails and they all fit!
Whoops. My organization here was really poor. I kept labling and re-labling sides to the point where it was hard to tell which piece fits which way. A momentary lapse and I cut the pins in the wrong direction.
Rather than redo an entire side, which currently takes me about an hour or two, I trimmed the pins on this misfitting side so that it fits into the other side’s tails. This, of course, left a massive gap but this is now the back of the drawer, I guess.
Anyway, all is well and now everything fits together well.
The next step was creating a drawer bottom. Unfortunately I didn’t take any photos here but basically I took three boards and edge jointed them together. I then planed them down flat leaving a nicely squared board about a half inch thick.
I also finally got the hang of trimming end grain. Turns out it’s fairly easy and pleasant with a scary sharp blade. Next project is to build a shooting board.
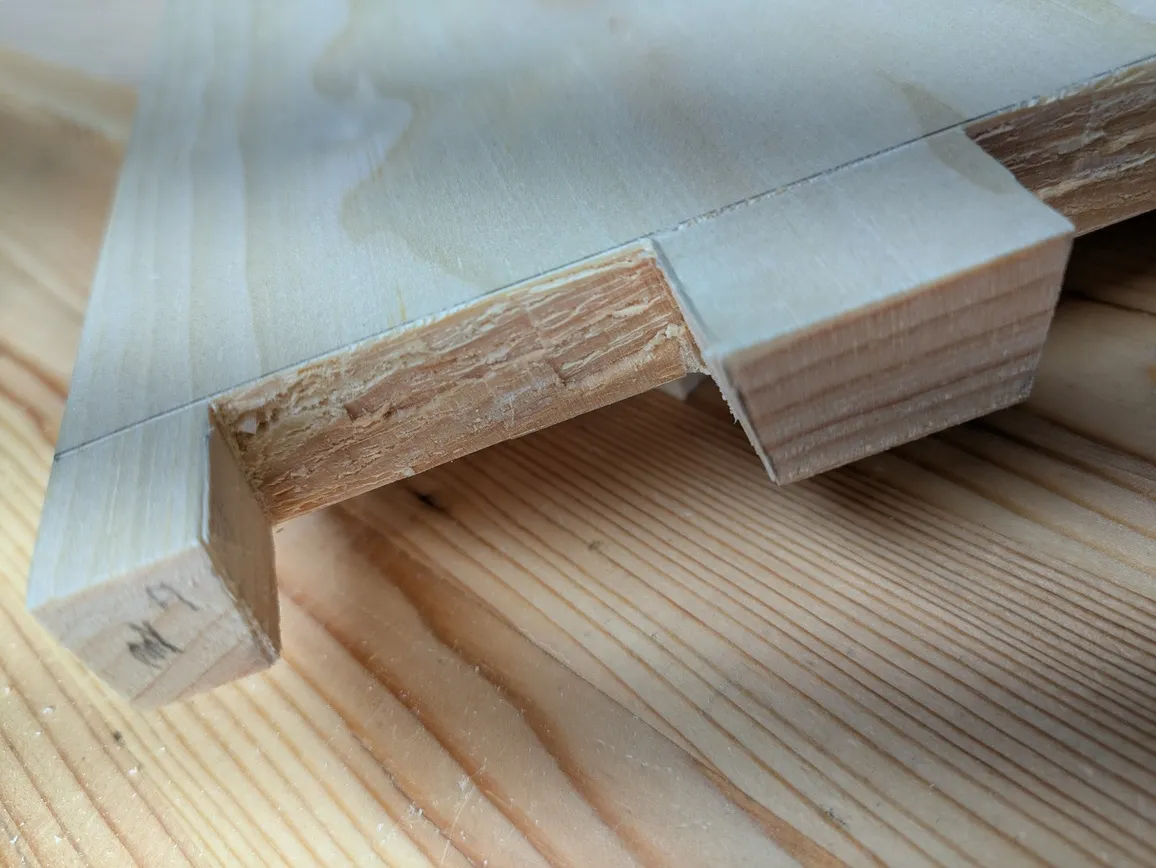
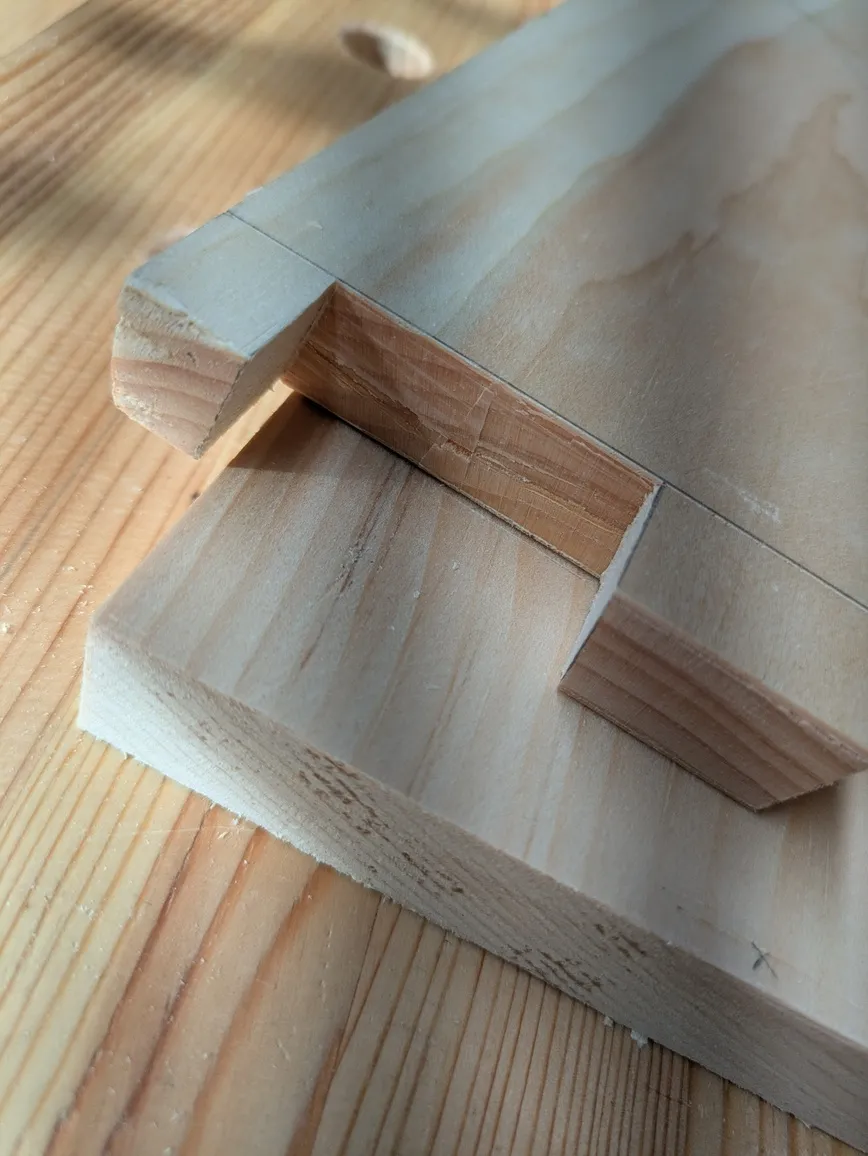
The plan for the drawer bottom was to run a 5/16” groove around the drawer sides and then rabbet the drawer bottom so that the board fits in, rabbet side down.
This went pretty smoothly - the grooving plane is quite fun to use. I did have one issue where the plane kept going into one part of the groove at an angle. I assumed the groove itself had some kind of twist and so I kept jamming it harder and harder. Turned out the plane bottom was hitting my vise jaw at that place which was pushing it out of the groove. Scuffed up my vise jaw and made a small mess of the groove but it wasn’t too bad. It’s always the simple things.
I don’t have a shoulder plane so to make the rabbet I used a saw to cut down to my line, using a deep knife wall to start. I then chisseled out the waste until just above the line. Finally I flattened the rabbet using my new home-made router plane.
Of course, I immediately broke the adjustment mechanism on it when the epoxy holding the washers and the nuts split. This made it annoying to make fine adjustments but I managed. I also think my plane is a tiny bit out of square so hitting exactly on the line was difficult, I think I took of slightly more material but overshooting here was fine since it would make the rabbet fit into the groove more easily.
Fitting it into the groove was actually easier than expected, largely due to how pine compresses. A little bit of paring with the chisel on the rabbet of each side and it slid right in.
The glue up was a bit of a tricky job since I had to assemble the whole thing while applying glue. I managed to work fairly quickly but there was very little squeeze out which makes me think the joints might not hold too well. I suspect there’s a non-trivial gap in the rabbet and groove but that’s the least important I would think. We’ll have to see how it holds up over time.